I'm not sure if too many people noticed, but there's a new tab on the top of my blog called Temp Monitor. Using a Raspberry Pi, I'm able to monitor my fermentation temperatures in real-time from anywhere, and I'm pretty flipping giddy about it. The values on the page auto-update every 15 seconds, and the graphs will update with every page-refresh. I figured this would be a cool idea for a writeup, so here it is.
This whole idea started when I found this post, which gives a step-by-step guide to make an Arduino-powered box to monitor fermentation temperatures in real-time. Considering Arduino is an open-sourced project, there are plenty of cheap-chinese knockoffs available, and a cost of $30-40, I absolutely had to give it a try.
After waiting a long 2-3 weeks for parts to arrive from China, I slapped it all together, and despite fumbling my way through some C++, I had it pushing temperatures to a COSM Feed after a few hours. Pretty awesome! The next step was to get the Arduino into the garage where my fermenting fridge is, which proved to be a challenge. For background knowledge, my router is located in the house at the furthest possible point from the garage. So between the cost of a 50' run of ethernet, and having a really tight attic, I decided to axe that idea. Wireless it would be.
Unfortunately, there aren't any cheap ways to make an Arudino wifi-compatiable, so in the end, I decided to go with a Raspberry Pi. For those unfamiliar with the humble little Pi, it's basically a $35 computer. It's powered by a SoC(system on chip) ARM processor (the same ones in our smartphones), so it can run a full operating system. It also has two USB ports, and an HDMI port, which makes it really handy to set up. It's OS (Raspbian), supports a number of USB wifi adapters out-of-the-box, including a cheap $5 one that I just so happened to have lying around the house.
So, let's get to the meat and bones of this. First off, I'd like to thank the aforementioned HBT post up top, as well as a number of guides on Adafruit, and lord-knows how many posts I found via Google. Secondly, this is going to be a very long, and very technical post. Without a doubt, my longest post to date. If this isn't your thing, don't fret, I'll have more beer-related posts on the way, check back soon, and Cheers! Assuming you're curious, or want to give this a try, here's what you'll need:
Parts:
- A Raspberry Pi (I bought the Model B)
- A 5V power supply, 700mA minimum. (You probably have half-a-dozen of these already in the form of cell phone chargers.)
- A micro-USB cable. (Again, you probably already have one)
- A USB Wifi Adapter. There are number of these for $7 or less on eBay that should work. Here's the cheapest one that I can guarantee would work.
- DS18B20 temp sensor(s). Buy as many as you like (I'm using two). DealXtreme has them for super cheap. Adafruit also sells them for like $4. They have a nice waterproof one for $10. You're choice (My $2 DX specials are working fine).
- A 4.7k resistor. Buy one from RadioShack if you're not sure where to get one (don't pay more than a dollar).
- Wire. Spare Ethernet cables work great.
- A GPIO ribbon cable (optional), but for $3, highly recommended.
- A 4GB+ SD Card
Skills:
- Patience
- Basic soldering abilities
- Rudimentary programing knowledge. (I might be a self-proclaimed Google-Ninja, but I'm nothing close to a programmer.)
Step One
Follow the Raspberry Pi quick start guide. It will walk you through loading Linux on your Pi. My only recommendation is during Step 5. The Pi will bring up an initial config window. Select the boot_behavior option, and have it automatically boot to the desktop on startup.
At this point, you should have what looks like a Linux computer. Hopefully you've connected it to a TV or computer monitor, and connected a keyboard/mouse. Don't worry about the temp probes yet, we'll get to that. Our next steps are sorting out the WIFI, and setting up a VNC server. VNC will allow you to remote control the Pi from your computer. This will prove very handy in the future, so you can make changes without having to plug in a keyboard, monitor, and mouse.
Step Two
Updates. We need to update the Pi. Double-click the LXTerminal on the Desktop. Type:
sudo apt-get updatethen once that completes
sudo apt-get upgradeThat will take awhile to run. Go have a beer. Once it's complete, reboot the Pi.
Step Three
This part is a bit of a pain, but we need to setup the wifi adapter. Click the Wifi-Config icon on the Desktop. It should have adapter wlan0 selected. Hit Scan at the bottom, and you should see your SSID. Double-Click it, and enter your wifi-password on the config screen. Hit 'Add'.
It should connect, and within 30 seconds, you should see an IP Address populate. Write that down. Next we need to set the wifi to auto-start when the Pi boots. Open the LXTerminal, and type:
sudo nano /etc/network/interfacesNano is a lightweight text editor. We're opening the file 'interfaces'. In here, you need to add the line 'auto wlan0' after the line 'allow-hotplug wlan0'. It should look like this:
allow-hotplug wlan0
auto wlan0
Now hit CTRL-X, then choose Y to save the file, and finally hit ENTER to confirm. It should bring you back to the terminal.
Step Four
Remote control. We're going to want to install VNC, which will let you remote control the Pi. This is pretty easy. Open LXTerminal and run:
sudo apt-get install tightvncserverOnce that completes, type:
vncserver :1It will prompt for a password (8char max), and when it asks for a view-only password say no. Now you can use a VNC client to connect to your Pi. Use the IP address you wrote down above, and connect to port 1 (e.g. 192.168.1.145:1). Lastly, we need to configure VNC to run at start up. Open LXTerminal again.
cd /home/pi
cd .config
sudo mkdir autostart
cd autostart
sudo nano tightvnc.desktop
Now that we're back in nano, copy and paste in the following:
[Desktop Entry]
Type=Application
Name=TightVNC
Exec=vncserver :1
StartupNotify=false
Again, hit CTRL-X, choose Y to save, and hit ENTER to confirm. It should bring you back to the terminal. That's it. Reboot the Pi, and test if you can VNC to it once it boots. If so, we no longer need the monitor, keyboard, and mouse! Let's move on to temperature control.
Step Five

Now we need to setup the DS18B20 temp probes. These probes are really cool because they are 'one wire' temp probes. That doesn't mean that each probe runs off of a single wire, rather it means that any number of probes can run off the same set of three wires (in our case). The above diagram illustrates how to wire up two probes with an ethernet cable. In this example the bump on the probes is facing up. You can solder the two temp probes together at any point. You'll also need to solder a 4.7k resistor between the Data and Ground wires. I'd do this after the point you combine the probes, so that you only need to solder in one resistor.
I'll spare the details on soldering, as there are plenty of great guides and videos on Google. Now, connect the GPIO ribbon cable to the RPi, and shove the wires into the other end of the Ribbon cable. Here's the pinout diagram. Looking at the bottom of the ribbon cable, the pins will look reversed. It's that whole upside-down thing.

Step Six
We need to test our temp probes. VNC into your Pi, and open up the terminal. Type:
sudo modprobe w1-gpio
sudo modprobe w1-therm
cd /sys/bus/w1/devices
ls
cd 28-*
cat w1_slave
After you type LS, you'll see a list of the serial numbers for your temp probes. If you only have one, you'll see one number starting with 28-, etc, etc. Replace the * with your serial number. After the cat w1_slave command, it should spit out a number t=22306. This is the temperature in C with 3 decimal spots (22.306C). Assuming you get a reading, you know it's working.
Step Seven
We're almost there, now we need to write a program to poll the temperatures and send those readings to COSM. Before we do that though, we need to load some software packages. Run these commands, consecutively, after each finishes.
sudo apt-get install python-dev
sudo apt-get install python-pip

sudo wget -O geekman-python-eeml.tar.gz https://github.com/geekman/python-eeml/tarball/master

sudo tar zxvf geekman-python-eeml.tar.gz

cd geek* (hit the TAB key after you type the word geek. It'll type it for you)

sudo python setup.py install
Step Eight
Create a COSM account. Choose Arduino as the device to add. Give your Feed a name and hit Create. It will give you a Feed ID (6-7 digit number), and an API_Key (20-30 digit key). Write both down. Your API_Key is case sensitive.
Step Nine
Let's write our program. I saved my python script into the /media folder. So first off:
cd /media
sudo nano temp.py
From here, you can copy and paste my script below. Be mindful of the lines that begin with a '#' where I've left notes. Those lines are commented out, so you can leave them in the code. They'll tell you to edit something for your setup.
#!/usr/bin/env python
# -*- coding:utf-8 -*-
import os
import glob
import time
import eeml

os.system('modprobe w1-gpio')
os.system('modprobe w1-therm')

# Reaplce the 28-* numbers with your temp probes
# Delete both device2 lines if you have 1 probe
base_dir = '/sys/bus/w1/devices/'
device1_folder = glob.glob(base_dir + '28-00000480c6e8')[0]
device1_file = device1_folder + '/w1_slave'
device2_folder = glob.glob(base_dir + '28-000004837542')[0]
device2_file = device2_folder + '/w1_slave'

# Put in your API KEY, leave the apostrophes
API_KEY = 'KX1InCoYvpAcZNRkvkjsdf23423vscf'

# Insert your Feed Id number, 120160 is mine
FEED = 120160

API_URL = '/v2/feeds/{feednum}.xml' .format(feednum = FEED)

# We're defining device 1
def read_temp_raw1():
    f = open(device1_file, 'r')
    lines1 = f.readlines()
    f.close()
    return lines1

# Device 2. DEL this section if 1 probe
def read_temp_raw2():
    f = open(device2_file, 'r')
    lines2 = f.readlines()
    f.close()
    return lines2

# Polling the temp, and converting to F
def read_temp1():
    lines1 = read_temp_raw1()
    while lines1[0].strip()[-3:] != 'YES':
        time.sleep(0.2)
        lines1 = read_temp_raw1()
    equals_pos = lines1[1].find('t=')
    if equals_pos != -1:
        temp_string = lines1[1][equals_pos+2:]
        temp_c = float(temp_string) / 1000.0

# I use the +32 to calibrate my probes.
# adjust as needed. +32 is standard
        temp_f = temp_c * 9.0 / 5.0 + 31.52

# I'm rounding my temp to 1 decimal
        temp_r = "%.1f" % round(temp_f,1)
        return temp_r

# This section is probe2, delete if needed
def read_temp2():
    lines2 = read_temp_raw2()
    while lines2[0].strip()[-3:] != 'YES':
        time.sleep(0.2)
        lines2 = read_temp_raw2()
    equals_pos = lines2[1].find('t=')
    if equals_pos != -1:
        temp_string = lines2[1][equals_pos+2:]
        temp_c = float(temp_string) / 1000.0
        temp_f = temp_c * 9.0 / 5.0 + 31.77
        temp_r = "%.1f" % round(temp_f,1)
        return temp_r

# Listing the temps in the window, delete read_temp2() if needed
while True:
 print(read_temp1(), read_temp2())
        pac = eeml.Pachube(API_URL, API_KEY)

# FermentationTemp is my datastream name. Change if you like
        pac.update ([eeml.Data('FermentationTemp', read_temp1(), unit=eeml.Fahrenheit())])

# Ditto for Fridge temp
        pac.update ([eeml.Data('FridgeTemp', read_temp2(), unit=eeml.Fahrenheit())])
        pac.put()

# 15 seconds is how often it checks the temp. Adjust if you like.
        time.sleep(15)
I know that's a lot of code, but take your time going through it, and it should work. Hit CTRL-X, the Y to save, then Enter to confirm. Then to test it, type:
sudo python temp.py
Wait a few seconds, and you should see temperatures appear in the window. It should update every 7 seconds. Now check your COSM feed. You should see it reporting temperatures. Success!
The only thing left to do is setup our script so that it runs when the RPi boots. This way if it gets rebooted, it'll fire back up, and start sending out temps. First, we need to make our script executable:
sudo chmod +x temp.py
Then, we're going to do the same thing we did with VNC.
cd /home/pi
cd .config
cd autostart
sudo nano temp.desktop
And again, in Nano, create a similar entry:
[Desktop Entry]
Type=Application
Name=Temp
Exec=sudo /media/./temp.py
StartupNotify=false
And with any luck, that should be it. Reboot the Pi one last time, and check COSM to see if it's getting current data from your temp sensors. If so, that's it. Situate your Pi in a cardboard box or something, and you're all set.
I know this seems like a lot of work, but to be honest, it only takes a few hours to set up. Plus the ability to monitor your temperatures in real-time from anywhere is f'ing awesome.
Cool! It's really nice you can do something like this on the cheap. I however am gonna wait for the beerbug. http://www.kickstarter.com/projects/parasitx/the-beerbugtm-digital-hydrometer it can monitor the temp and act as an hydrometer at the same time so you get both temp and SG. Eliminating the need to open the fermenter and take any samples all together.
ReplyDeleteYa, that thing looks pretty sweet. Having real-time gravity readings would be awesome.
DeleteNice work Scott. I did notice that tab just before the readings started posting and was wondering what that was. I agree with the above Beerbug looks really cool. I didnt get in on the kickstarte but am anxious to see these start rolling out.
ReplyDeleteSide note if you ever make it out to socal hit me up would love your help brewing a batch or just getting a beer to pick your brain in person.
Ya, definitely.
DeleteDo you use a thermowell or just tape the sensor to the side of the fermenter?
ReplyDeleteI just tape it to the side. I've checked the temps, are they are never more than 0.5F off from the actual wort temp.
DeleteAre you happy with the RPi? There is alot of information but im noe at the point that if more trouble than if worth. I just want to keep it simple as you did. Still recommend the RPi? What is the maximum number of temp sensors will it do at one?
ReplyDeleteI love the little pi, but this project is definitely very involved. You can do a ton of sensors on the same wire. I've seen people use over a dozen.
DeleteIm looking at purchasing one and giving it a shot. Does the COSM feed support mobile access?
ReplyDeleteIt does, but the support was better. COSM renamed the company to Xively, and I'm not finding it as good.
DeleteBam! Followed your tutorial to the -T- and had no issues! Thanks a million for the concise and very clear write-up. Sincere Regards!
ReplyDeletetim
That's awesome!! After this I had issues where my temps would stop reporting after 4-12 hours. As it turned out, I didn't have an exception handling in my script.
DeleteIf you're having that issue, drop me an email at bertusbrewery@gmail.com, and I can give you the exception code so the script doesn't error out.
Thanks, I'll probably have to do that! I've got my digital temp controller built up and now the RPi- just waiting for a good deal on a chest freezer to pop up on CraigsList. I didn't think of it, but I should already have been operating the RPi to check for errors during this time.
DeleteThanks again and I really enjoy your site!
Scott
ReplyDeleteCan you revise the blog with the exception code so the script does time out after 4 hours of use?
I was planning on re-visiting it, but I forgot. Thanks for the reminder.
Deletewhile True:
# print(read_temp1(), read_temp2())
try:
pac = eeml.Pachube(API_URL, API_KEY)
pac.update ([eeml.Data('FermentationTemp', read_temp1(), unit=eeml.Fahrenheit())])
pac.update ([eeml.Data('FridgeTemp', read_temp2(), unit=eeml.Fahrenheit())])
pac.put()
time.sleep(15)
except:
continue
So you'll want to replace the very bottom section of your code with this, or just copy in the three new lines. Here's a breakdown of the changes.
A. I commented out the 'print' line with a #. Once I know the program works, and pushes data to Xively, I don't need to see the temps in the terminal window anymore.
B. Insert a 'try:' before the pac commands that push data to Xively(COSM). This is where the error was happening for me. My RPi would drop a packet, or momentarily lose connection to my wifi, and if a single 'put' request failed, the program just quit.
C. After the time.sleep line, insert the 'except:' and continue lines.
D. This tells the Pi to: Try to send the data out to Xively. If it works, sleep for 15sec, and repeat the command like normal. the except command catches the exception, and instead of erroring out, and the program quiting, it tells the script to instead just go through the script again. So basically it'll just keep polling temperatures and attempting to send them to Xively, whether or not they are actually going through.
E. This is probably the most basic form of exception handling I could have put in the code, but it's got the job done for me, so I figured why complicate things. I think I've only had to reboot it twice in like 2-3 months since I added that in there.
It's up and running now for more than a day! Thanks for the update. Curious, have you experimented with adding more temp probes? I'm working on it, but it's turning out to be a bit more difficult than I figured. BTY, I made up some more temp probes in hoping to add them on and followed your illustration above. I think the resistor has to be connected between the 5v and Data wires to work. Is this correct? Or is it working for you with the Data and GND connected?
DeleteCheers!
Ya, my drawing is backwards (I really need to fix that). The resister does need to go between the 5v and the data wires. I have combined the wires from my two probes. (Gnd to Gnd, 5v to 5v, Data to Data). And the resister connects the 5v to Data wires.
DeleteMy understand is that you can connect any number of probes to the same shared three wires. I haven't tested more than two though.
Very good information, you got any pictures of how it looks assembled the PC? finally you can add a screen where you can see the temperature values on the same computer. Thanks Oscar
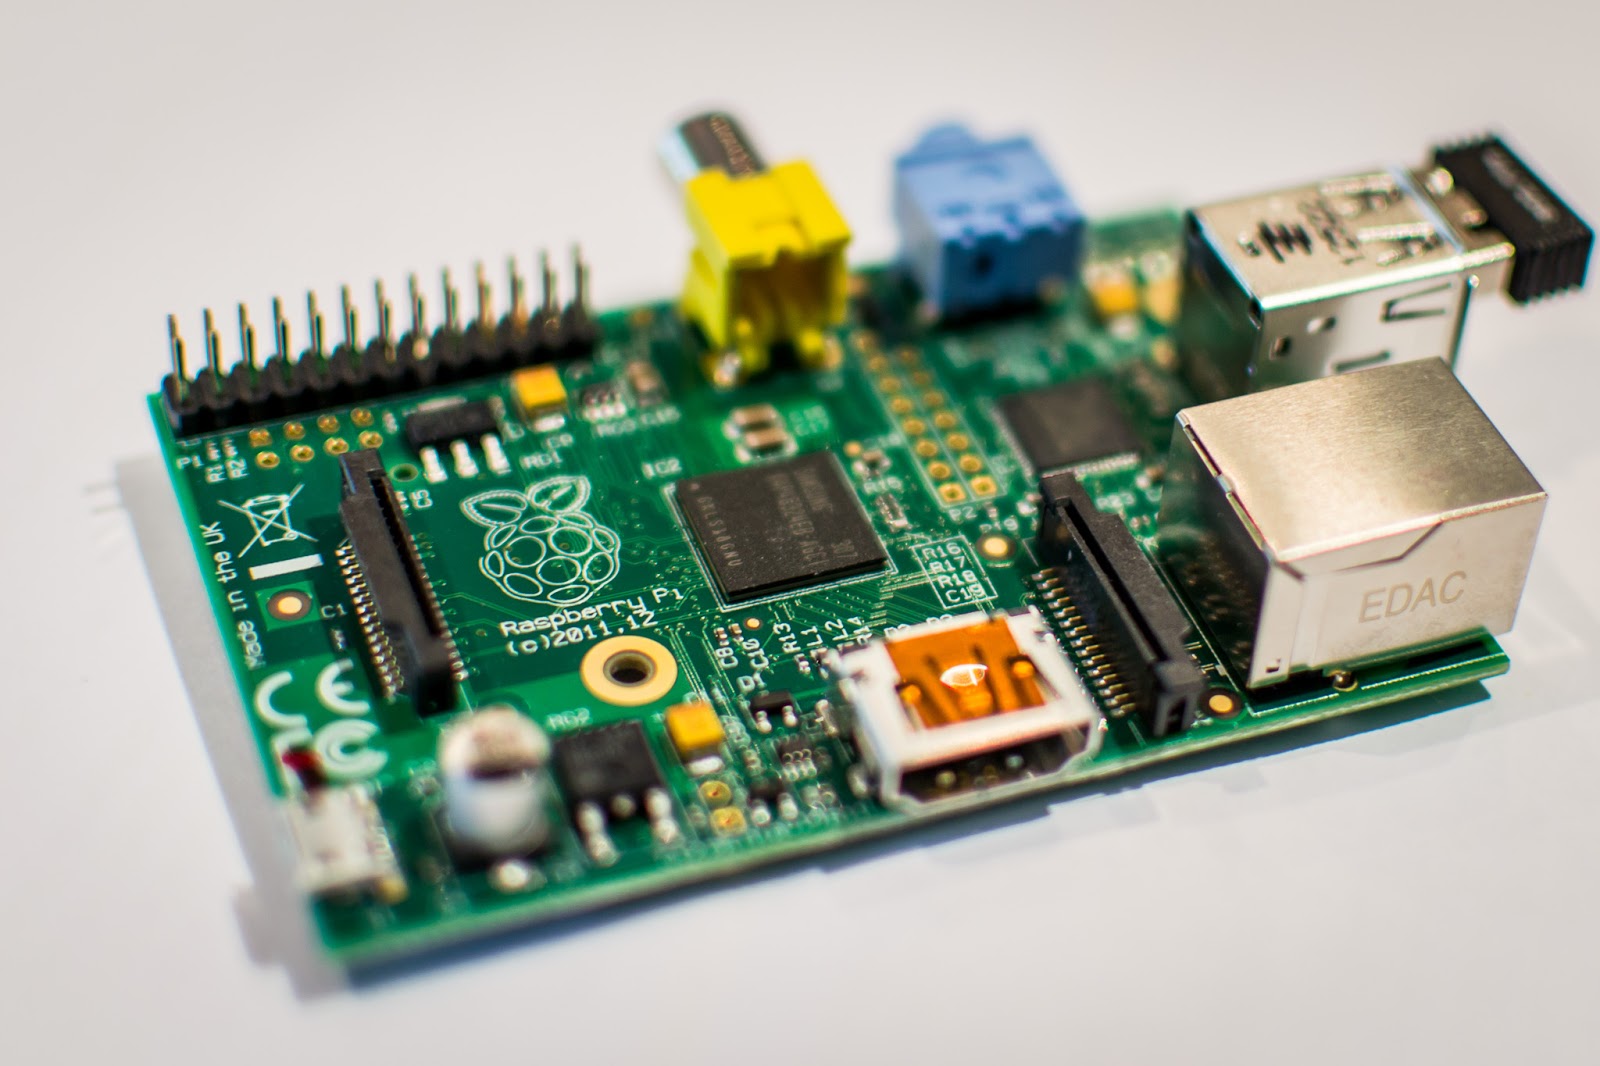
ReplyDeleteI can probably take a picture. It really doesn't look much different than the picture at the top of this post. That more or less is the 'assembled' PC. I just stuffed mine into a cheap glad-ware container.
DeleteI need your help as I'm having problems with the code. I have one sensor. After typing in sudo python temp.py I get the following message. Please help!
ReplyDeletepi@raspberrypi /media $ sudo python temp.py
File "temp.py", line 54
pac = eeml.Pachube(API_URL, API_KEY)
^
IndentationError: unexpected indent
pi@raspberrypi /media $
I have ran may python code to xively however with script will not work. temperatures print and are working however the data will not be pushed to the internet...
ReplyDeleteThis may be a silly question, but how do you copy and paste. I'm running VNC Viewer on my Windows 7. I'm running Firefox on my Win7 and looking at your page and copying the code. Then I go to the VNC Viewer window and I can't figure out how to paste the code in the LXTerminal window.
ReplyDeleteThanks Scott
Paste is usually 'right-click' in most terminal windows.
DeleteAny reason you coded in Python instead of C++ when you moved to RPi?
ReplyDeleteIt was what I was able to figure out. I'm really a programmer by any stretch of the imagination.
DeleteOk so i love this so far. Now what I want to add is switching for relay to trigger the fridge and cool down the fermenter. Then possibly a second relay for a heating lamp to bring the temp up if it gets too cold.
ReplyDeleteMy temp probes are in the mail so once i have the temp monitor working nicely i will have to update the code a little bit. If i get it figured out i will share.
Going to use a relay like this one http://www.radioshack.com/product/index.jsp?productId=2049721&CAWELAID=37889620 to switch the AC line into the fridge. And then a ceramic heat light and another relay to bring up the temp. Last thing i am debating doing is adding a webcam and an IR light, then remotely connect to that so i can remotely check on the airlock and see if we are still bubbling away while i sit at my desk at work.
Anyways, thanks for the great write up.
You can looking into the open source project BrewPi.com. This allows you to control fermentation temps through your browser, no coding required, but you do have to do installation of linux etc. You will also need to rewire your refrigerator or freezer.
ReplyDeleteIt appears xively is no longer hosting COSM feeds. Have you switched over to a new service?
ReplyDeleteGreat project, one question it looks as if you do all the command in the shell, so instead of using vnc why not just use openssh server and ssh into the box?
ReplyDeleteI tried to keep it as user friendly as possible for most people that aren't familiar with command line.
DeleteOn my personal box, that is what I've done. I'm way too lazy to open VNC every time i want to log in.